Gameboy and music

I recently got my music bug again, and with my recent trip to Australia was able to bring back my original Gameboy. Combining the two, I thought I’d check out what music-making capabilities the Gameboy had. The most popular software was “Little sound DJ” (https://www.littlesounddj.com/). I purchased the full version of that, and while I could run that on an emulator, I wanted to run it on the real deal. To do this, I purchased a Gameboy flashing cartridge, “Flash BOY” ( https://www.ebay.com.au/itm/223590080458). This came with few instructions however. I was able to plug it into my laptop’s USB and see that it displayed as a FTDI device, but would need drivers. I installed some from here: https://www.ftdichip.com/Drivers/VCP.htm but after more googling for flashing software, found that this also provided some drivers: https://sourceforge.net/projects/gbcf/

Starting up that tool, I put the flash boy cartridge into the flash boy itself and was greeted with this:

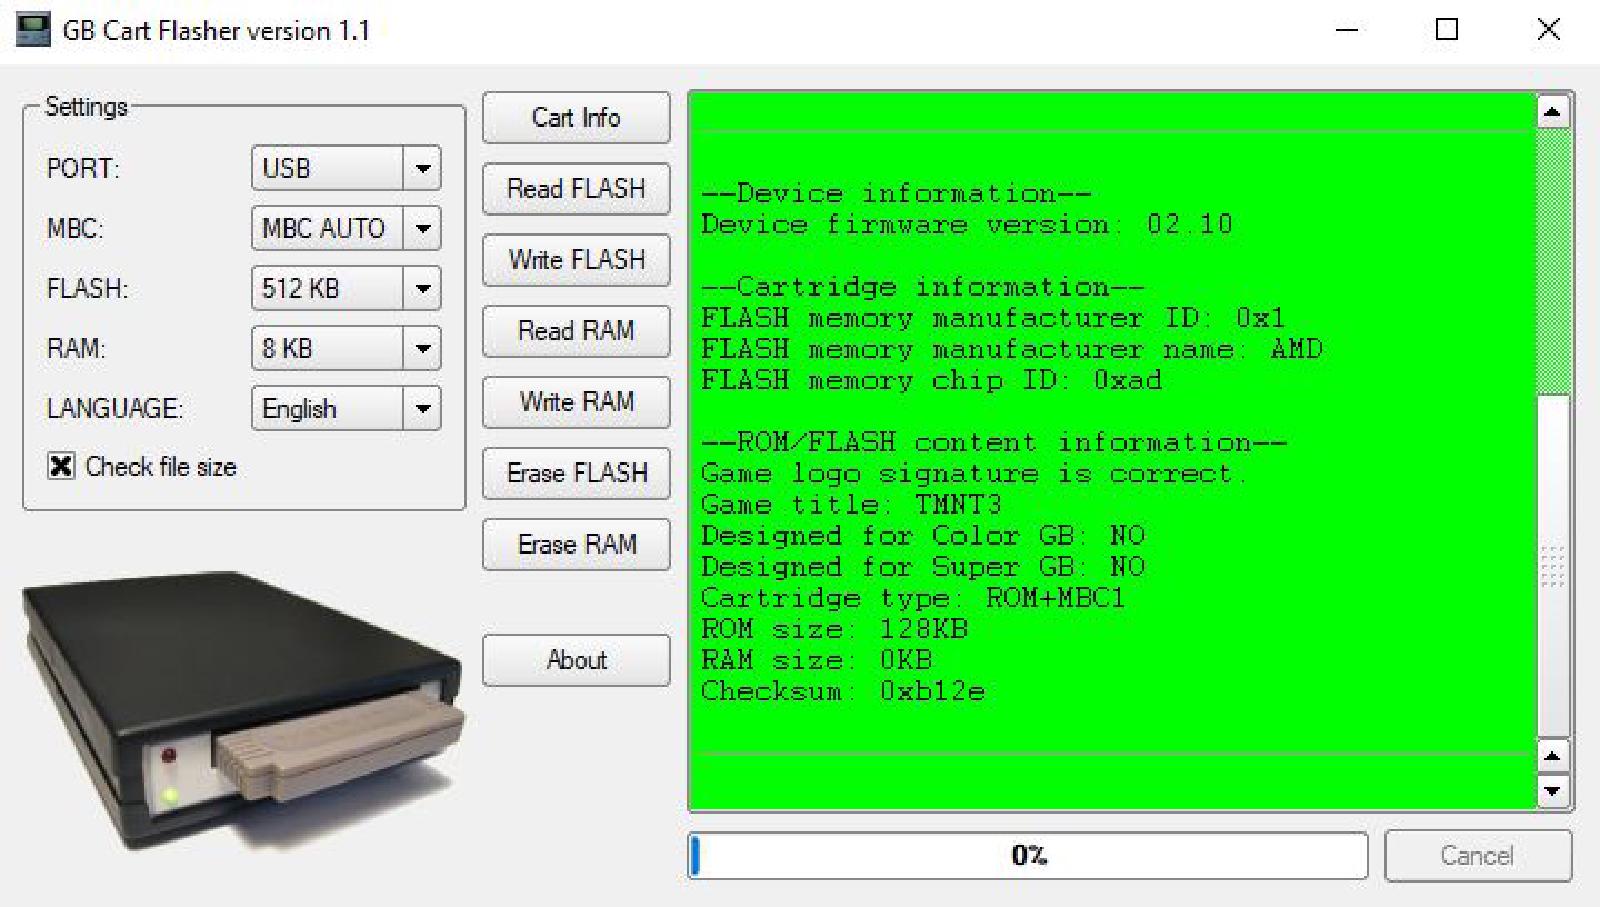
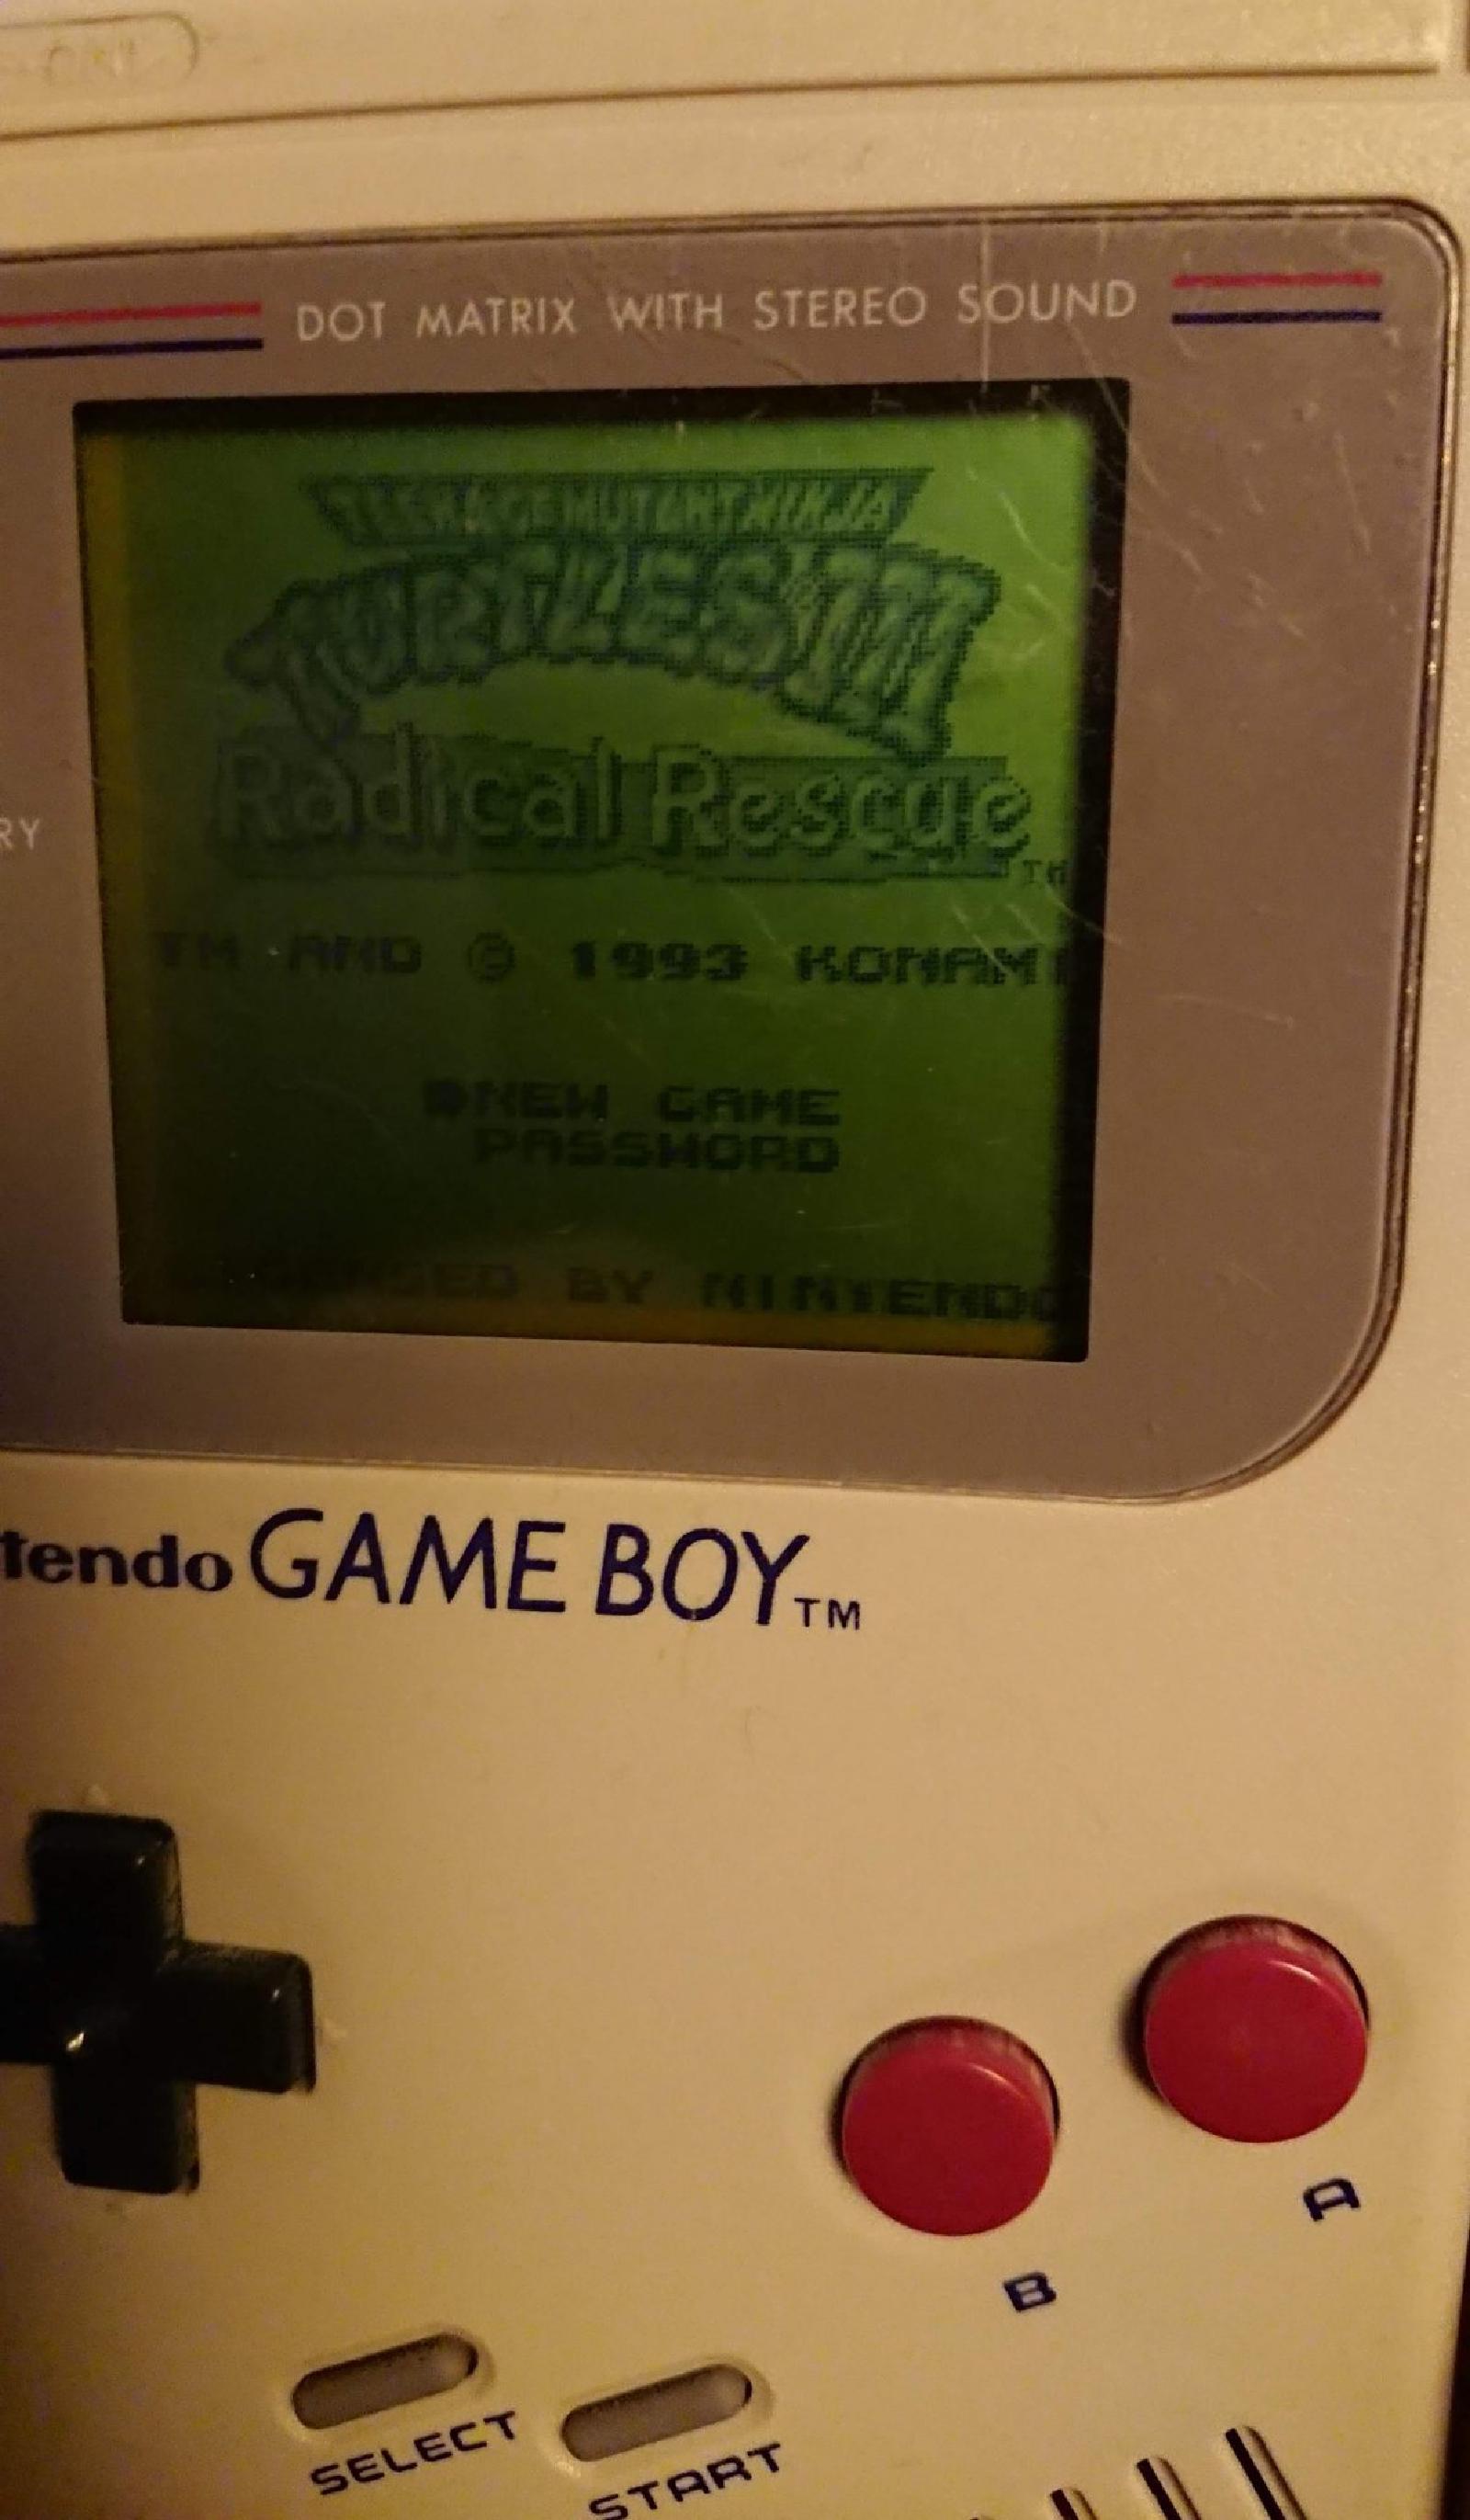
TMNT3? I put the cartridge in my gameboy just to check and - yep! There was TMNT3! I guess they used it as a test ROM.

Anyway, that was soon replaced with the LittleDJ software. I first hit “Erase FLASH” and then “Write FLASH” which gave me a file choice dialog box, where I chose the little sound DJ .gb file. It took a few minutes to flash. I put the cartridge in and was greeted by the text ““CARTRIDGE TEST SRAM FAIL TRY CLEANING PINS OR REPLACE BATTERY”.

I didn’t really know how to fix this, so I reset my FLASH size to be 2048 KB (16 Mb, which is what the Flash BOY supported), and upped the RAM to 32 KB. I did a full erase FLASH and RAM, then reflashed the DJ file, and read back the results:

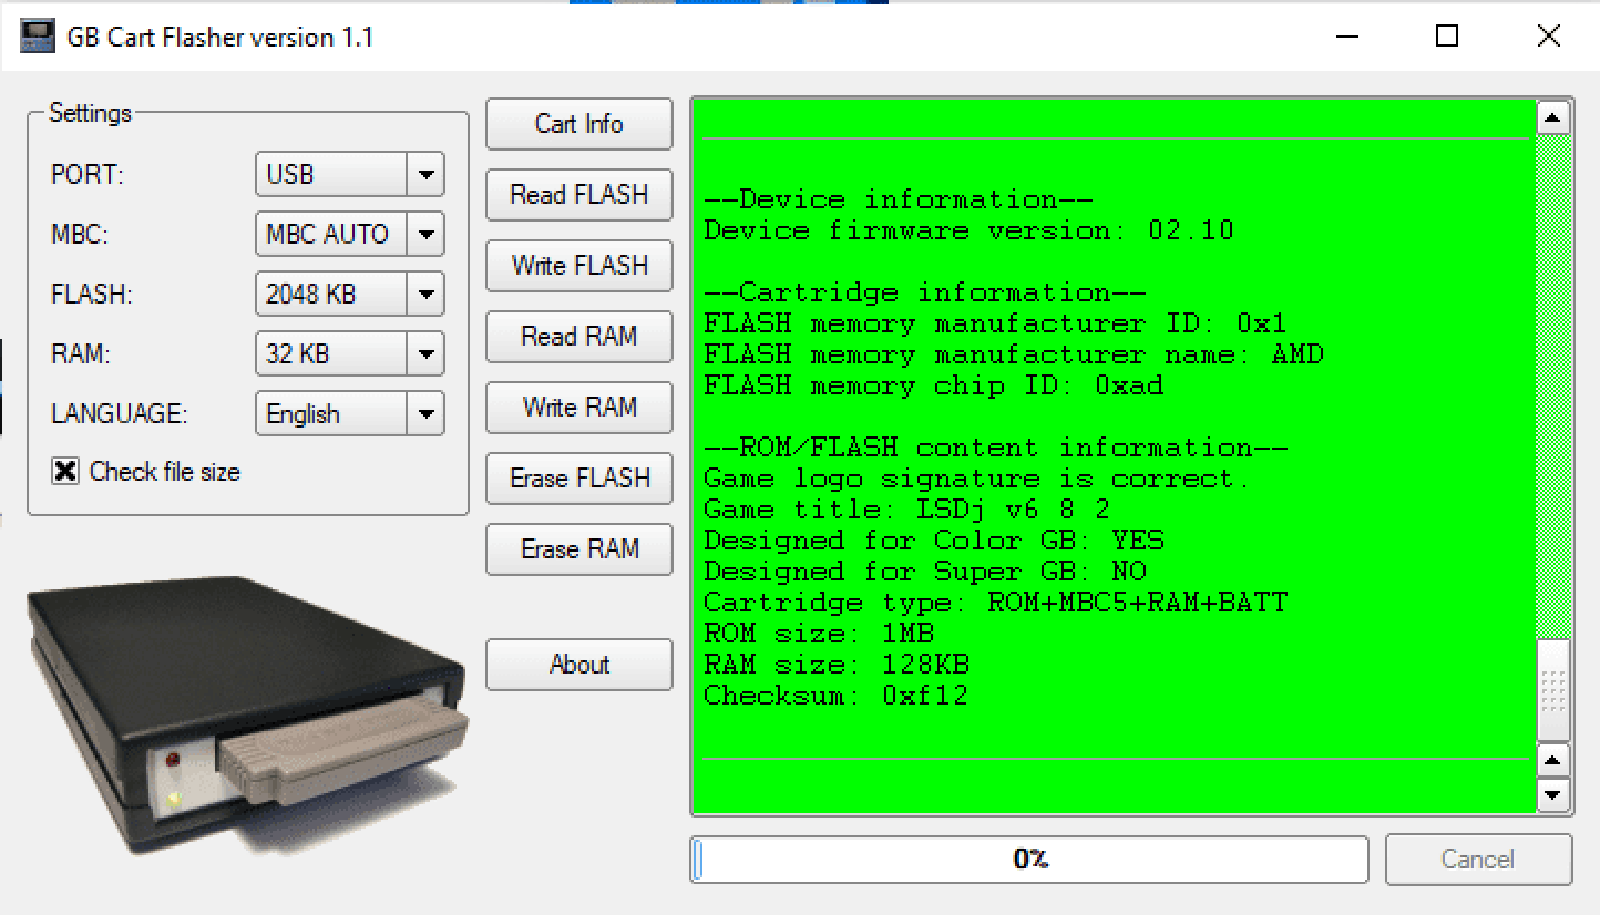
Success! (Previously I was getting a bad game logo signature and a “Flash chip manufacturer name” of “Xilinx”).

…. or was it? Although this now wrote to the cartridge correctly, the ROM was not that of the DJ software. Looks like I will be needing a part 2 to this post!

A journey with "Embedded programming with Android": part 1

I purchased the Kindle edition of this book: https://www.amazon.com/Embedded-Programming-Android-Bringing-Scratch-ebook/dp/B013IQGX3A

and since I’m going through the book in 2019, there are a few gaps to bridge.   The first was creating an emulator.  I did this via command line, and step 1 was to get a basic Android SDK downloaded.  I use Vagrant/Virtualbox for my development, so this was used to set up the SDK

put this here

Once that’s done, I need to configure my emulator to use Android API 15.  To get an idea of what I can install, I use the sdkmanager tool to list all the available options:

$ANDROID_HOME/tools/bin/sdkmanager --list

Which gives a bunch of output, but I’m only interested in the android-15 results:

  system-images;android-15;default;armeabi-v7a      | 5    | ARM EABI v7a System Image
  system-images;android-15;default;x86              | 5    | Intel x86 Atom System Image
  system-images;android-15;google_apis;armeabi-v7a  | 6    | Google APIs ARM EABI v7a System Image
  system-images;android-15;google_apis;x86          | 6    | Google APIs Intel x86 Atom System Image

The book says we’ll be developing for arm, and I don’t think I’ll need Google APIs, so Ihoose the armeabi-v7a.  I don’t know how this is all going to fly in Virtualbox either, so I yolo by running the following command and accepting license with “y”.

$ANDROID_HOME/tools/bin/sdkmanager "system-images;android-15;default;armeabi-v7a"

Cool.   Now to create an emulator image, right?  I don’t have any idea of how to configure it via command line, but I’ll try and feel my way through:

$ANDROID_HOME/tools/bin/avdmanager create avd --name mytestavd --abi default/armeabi-v7a --package "system-images;android-15;default;armeabi-v7a"

Which results in “Error: “emulator” package must be installed!”

Ok, let’s install that (and wait!):

$ANDROID_HOME/tools/bin/sdkmanager emulator

And then I try re-running the command to create the avd, this time successfully.  I answer “no” to creating a custom hardware profile, as I answered “yes” the first time and didn’t know what to answer for some of the questions.  I believe I can play around with this at a later time.  Now where did that go?   Find out with this command:

 $ANDROID_HOME/tools/bin/avdmanager list avd

Output:
Available Android Virtual Devices:
    Name: mytestavd
    Path: /home/vagrant/.android/avd/mytestavd.avd
  Target:
          Based on: Android 4.0.3 (IceCreamSandwich) Tag/ABI: default/armeabi-v7a

So, it seems like we may have some basic steps done.  More will be done in a part 2 of this post, hopefully in the New Year.